Breaking News
How To Change Bluetooth Name Windows 10
среда 29 апреля admin 15
Bluetooth is an extremely useful feature of Windows PC that allows you to connect to other Bluetooth devices in the vicinity. You can send and receive files, view your phone content by pairing up with the phone, connect to TV, and more.
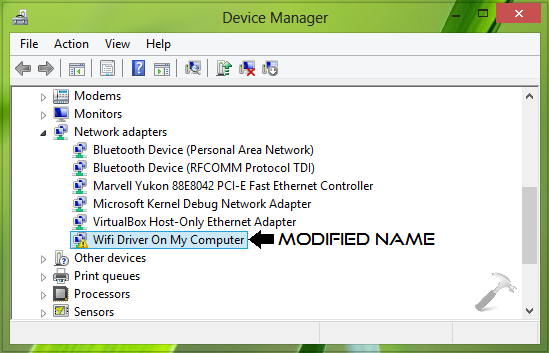
Aug 30, 2019 If you downloaded individual files, and at least one file has an.inf file name extension and another has a.sys extension, do the following: In the search box on the taskbar, type Device Manager, and then select Device Manager from the list of results. In Device Manager, select Bluetooth.
However, you may want to rename the Bluetooth adapter of your PC to make it easier to be detected instead of just the device name. We have some quick methods for you that can help you to rename your Windows 10 PC Bluetooth adapter easily. Let’s find out how.
Method 1: How To Change The Bluetooth Name Of Your Windows 10 PC Via Settings App
Step 1:Desktop > click on the Start button > click on Settings located above the Power option in the context menu.
Step 2:Settings window > click on System.

Step 3: Next, on the left side on the pane > click on About > on the right side of the pane > Device specifications > click on Renamethis PC.
Step 4: Rename your PC dialogue > type a name of your choice > click Next.
It will now show a prompt with two options Restart now and Restart later. Choose an option based on your convenience. After reboot is completed, your PC name will show as your Bluetooth name.
Method 2: How To Change The Bluetooth Name Of Your Windows 10 PC Via System Properties
Step 1: Desktop > click on the Start button > search box > type Sysdm.cpl > hit Enter > System Properties.
Step 2:System Properties window > Computer Name tab > click the Change button.
Step 3: In the next window > Computer Name > type your choice of name > OK.
It will now ask you to restart your PC, click OK to confirm. It can also show you a prompt with Restart now and Restart later options. Choose an option as per your convenience. Once your PC has restarted, your Bluetooth name should be the same as the PC name.
I find passion in writing Tech articles around Windows PC and softwares
Recommended for You:
In Windows 10, there are a number of options which you can use to change sounds for different system events, configure output and input devices, and more. Starting with Windows 10, Microsoft has added the ability to change the output audio device with the Settings app.
Ip tool 1880 download. RECOMMENDED: Click here to fix Windows errors and optimize system performance
VisitMAINN E T W O R KReal HeroesFirefighterSystemLanguageProtectionCD Cover: PC:: (Digital Download):IndexGame Releases. 
Windows 10 allows you to choose which output audio device to use by default in the OS. Modern PCs, laptops and tablets can use classic speakers, Bluetooth headphones and many other audio devices which you can connect simultaneously.
The default audio output device is a device which Windows 10 is using to play the audio. Other device can be set to mute or to play the same audio stream. Note: Some third-party apps can utilize other devices with special options in their settings and override the system preferences.
There are a number of ways to choose the default audio device in Windows 10. Let's review them.
Change Default Audio Device in Windows 10
- Open Settings.
- Go to System - Sound.
- On the right, select the required device in the drop down list Choose your output device.
- You might need to restart some apps like audio players to make them read the changes you made.
You are done.
Set the Default Audio Device with the Sound flyout
Another new option starting with Windows 10 Anniversary Update is the ability to choose the default audio device right from the sound volume flyout. Here is how.
To change the Default Audio Device, do the following.
- Click on the sound volume icon in the system tray.
- Click on the up arrow in the sound flyout.
- Choose the desired audio device from the list.
- Restart your audio apps if required.
Set the default audio device with the classic Sound applet
The classic Sound applet can be used to set the default audio device. As of this writing, it is accessible from both the system tray and Control Panel. Here is how it can be done.
- Right-click the sound icon at the end of the taskbar.
- Select Sounds from the context menu.
- This will open the Sounds tab of the classic applet.
- Select the desired device in the list and click on the Set Default button.
Tip: the Sound dialog can be opened faster using one for the following commands:
Or
The command above is a Rundll32 command. The RunDll32 app allows launching classic Control Panel applets directly. See the full list of such commands available in Windows 10.
Note: The classic Sound applet is still available in the Control Panel as of this writing with Windows 10 Build 17074.
That's it
RECOMMENDED: Click here to fix Windows errors and optimize system performance